Managing the Inventory Items / Shopping List

Step by step
- How to Access the Inventory Items
To get to the inventory items, follow these steps:
- Log In: Ensure you are logged into your Qwizeen account.
- Navigate to Back Office: On the left side menu of your screen, you will find various options. Click on the Back Office option,
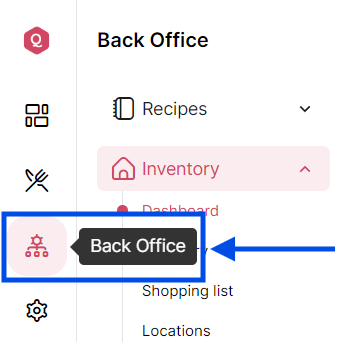
- Select Inventory: Under the Back Office section, you will see Recipes. Below that, find and click on Inventory. This will take you to the Inventory Dashboard.
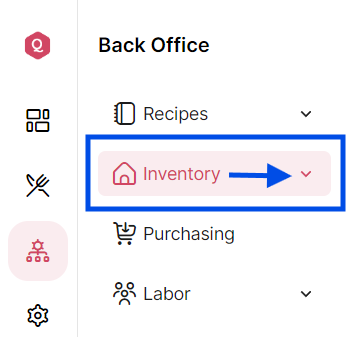
- Access Inventory Items
Within the Inventory Dashboard, click on the Inventory option again to open the Inventory Items menu.
- Features of the Inventory Items Menu
Once you are in the Inventory Items menu, you will see a comprehensive list of all inventory items. Here’s what you can see and do:
Inventory Items Overview
Adding New Inventory Items
- Click the green Add New button at the top right.
- Choose Inventory Item from the dropdown menu.
- Fill in the required fields (Status, Title, Unit, etc.).
- Save the new item to update the inventory list.

4. Filtering Inventory
- Click the Filter button next to the Add New button.
- Apply filters like item category, stock levels, or vendors to customize the view.
- The filtered results will be displayed in the inventory list.


5. Uploading Inventory via Excel
- Click the Upload Inventory Items button.
- Follow the instructions in the popup window:
- Ensure the Excel file includes columns such as Status, Title, Unit, Allergies, Brands, Image, and Barcode.
- Ensure the Excel file includes columns such as Status, Title, Unit, Allergies, Brands, Image, and Barcode.
- Drag and drop the file into the upload area or click Browse Files to select the file.
- Click Submit to upload and update your inventory.


6. Managing Inventory Columns
Click the Columns button to customize which columns are displayed on the dashboard.