This guide helps you create and manage Nutrition Labels for your meal prep operations.
What Are Nutrition Labels?
Nutrition Labels display important meal details like expiration dates and buffer margins to ensure accurate labeling and compliance.
How to Access Nutrition Labels
- Log in to your account.
- Go to Meal Prep > Nutrition Labels from the left menu.
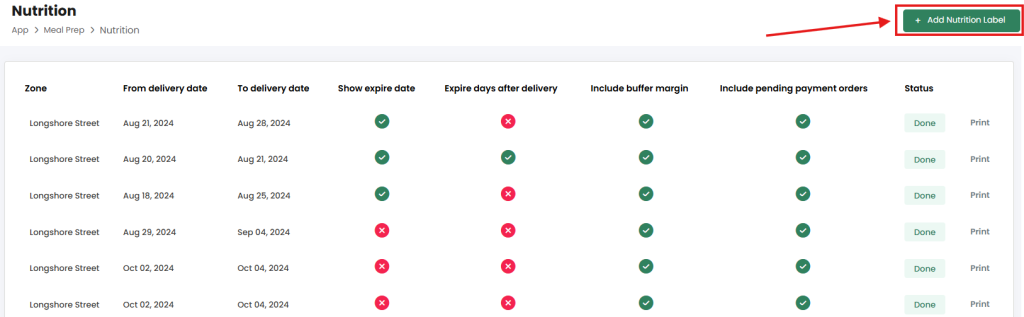
You’ll see the Nutrition Labels dashboard.
How to Create a Nutrition Label
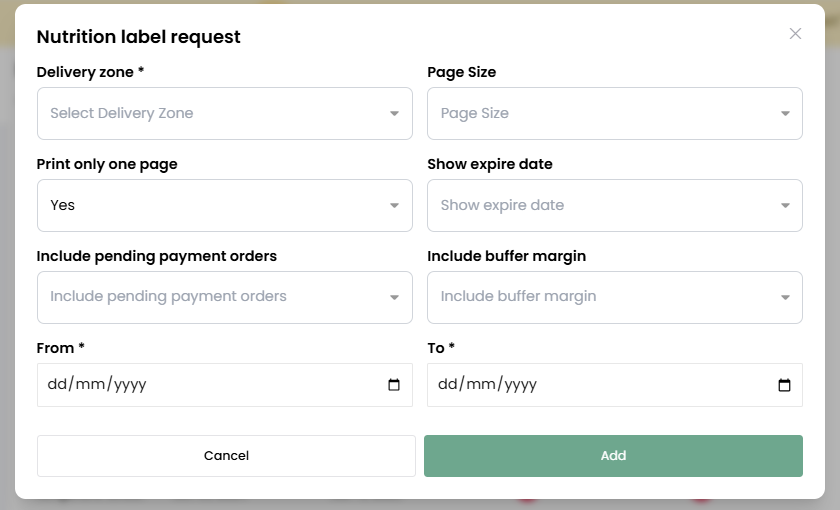
Click + Add Nutrition Label.
Complete the form:
Delivery Zone: Choose the delivery area.
Page Size: Select the page size for printing.
Print Only One Page: Choose “Yes” or “No.”
Show Expire Date: Decide if expiration dates are displayed.
Include Pending Payment Orders: Add orders awaiting payment if needed.
Include Buffer Margin: Add extra expiration days if required.
From / To Dates: Set the date range for orders.
Click Add to save.
Dashboard Overview
The dashboard shows:
- Zone: Delivery area.
- From/To Delivery Date: Label date range.
- Show Expire Date: Expiration date visibility.
- Expire Days After Delivery: Expiration buffer days.
- Include Buffer Margin/Pending Orders: Indicates if these were added.
Tips for Effective Labels
- Review Settings: Check label details before saving.
- Use Buffer Margins: Add expiration days for product quality.
- Update Regularly: Adjust labels for changes in delivery zones or products.
Troubleshooting
Wrong Expiry Dates? Check buffer margin and date range settings.
Can’t Add a Label? Fill all mandatory fields.